How to Trim and Cut Video with FFmpeg: Timestamps, Duration, Split (2026 Guide)

Need to extract a 30-second clip from a long video? Remove the first 10 seconds of a recording? Split a video into multiple parts? FFmpeg can do all of this from the command line—if you know the right flags.
This guide covers every trimming scenario with exact commands. And if you’d rather just drag a slider, there’s a free visual alternative at the end.
Prerequisites: Install FFmpeg

macOS:
brew install ffmpegUbuntu/Debian:
sudo apt update && sudo apt install ffmpegWindows:
Download from ffmpeg.org, extract, and add bin to PATH.
Basic Trimming
Cut by Start Time and Duration
Extract 30 seconds starting at the 1-minute mark:
ffmpeg -i input.mp4 -ss 00:01:00 -t 00:00:30 -c copy output.mp4-ss 00:01:00— start at 1 minute-t 00:00:30— duration of 30 seconds-c copy— copy streams without re-encoding (fast)
Cut by Start and End Time
Extract from 1:00 to 2:30:
ffmpeg -i input.mp4 -ss 00:01:00 -to 00:02:30 -c copy output.mp4-to 00:02:30— stop at 2 minutes 30 seconds
Cut the First N Seconds
Keep only the first 60 seconds:
ffmpeg -i input.mp4 -t 60 -c copy output.mp4Remove the First N Seconds
Skip the first 10 seconds:
ffmpeg -i input.mp4 -ss 10 -c copy output.mp4Cut the Last N Seconds
This requires knowing the total duration. For a 5-minute video, to remove the last 30 seconds:
ffmpeg -i input.mp4 -t 00:04:30 -c copy output.mp4Fast Copy vs Re-encoding
Fast Mode (-c copy)
ffmpeg -i input.mp4 -ss 00:01:00 -t 30 -c copy output.mp4Pros: Instant, no quality loss Cons: May start a few seconds before your timestamp (cuts at the nearest keyframe)
Precise Mode (re-encode)
ffmpeg -i input.mp4 -ss 00:01:00 -t 30 -c:v libx264 -c:a aac output.mp4Pros: Frame-accurate cutting Cons: Slower, slight quality loss from re-encoding
Best of Both: Input Seeking + Output Re-encoding
ffmpeg -ss 00:00:58 -i input.mp4 -ss 2 -t 30 -c:v libx264 -c:a aac output.mp4This seeks to 0:58 before decoding (fast), then precisely trims 2 seconds in to reach exactly 1:00.
Split Video into Multiple Parts
Split into Equal Parts
Split a 10-minute video into 2-minute segments:
ffmpeg -i input.mp4 -c copy -map 0 -segment_time 120 -f segment -reset_timestamps 1 segment_%03d.mp4This creates segment_000.mp4, segment_001.mp4, etc.
Split at Specific Timestamps
# Part 1: 0:00 to 2:00
ffmpeg -i input.mp4 -ss 0 -to 00:02:00 -c copy part1.mp4

# Part 2: 2:00 to 5:00
ffmpeg -i input.mp4 -ss 00:02:00 -to 00:05:00 -c copy part2.mp4

# Part 3: 5:00 to end
ffmpeg -i input.mp4 -ss 00:05:00 -c copy part3.mp4
Extract and Remove Audio
Extract Audio Track Only
ffmpeg -i input.mp4 -vn -c:a copy audio.m4a-vn— no video
Extract as MP3
ffmpeg -i input.mp4 -vn -c:a libmp3lame -b:a 320k audio.mp3Remove Audio (Keep Video Only)
ffmpeg -i input.mp4 -an -c:v copy output_silent.mp4-an— no audio
Common Errors and Fixes
Trimmed video starts with frozen frame or glitch
This happens with -c copy when the cut point isn’t on a keyframe. Fix by re-encoding:
ffmpeg -i input.mp4 -ss 00:01:00 -t 30 -c:v libx264 -c:a aac output.mp4Audio and video go out of sync after trimming
Add -avoid_negative_ts make_zero:
ffmpeg -i input.mp4 -ss 00:01:00 -t 30 -c copy -avoid_negative_ts make_zero output.mp4“Non-monotonous DTS” warnings
These usually don’t affect the output but indicate timestamp issues. If the output is broken:
ffmpeg -i input.mp4 -ss 00:01:00 -t 30 -fflags +genpts -c copy output.mp4Trimming is inaccurate by several seconds
Place -ss before -i for faster seeking, or after -i for accuracy:
# Faster but less accurate (seeks in input)
ffmpeg -ss 00:01:00 -i input.mp4 -t 30 -c copy output.mp4

# Slower but frame-accurate (decodes then seeks)
ffmpeg -i input.mp4 -ss 00:01:00 -t 30 -c:v libx264 -c:a aac output.mp4
Skip the Terminal: Use WaveSpeed Desktop Instead
Precise video trimming with FFmpeg means juggling timestamp formats, keyframe alignment, copy vs re-encode decisions, and sync issues. For most people, that’s way more complexity than necessary.
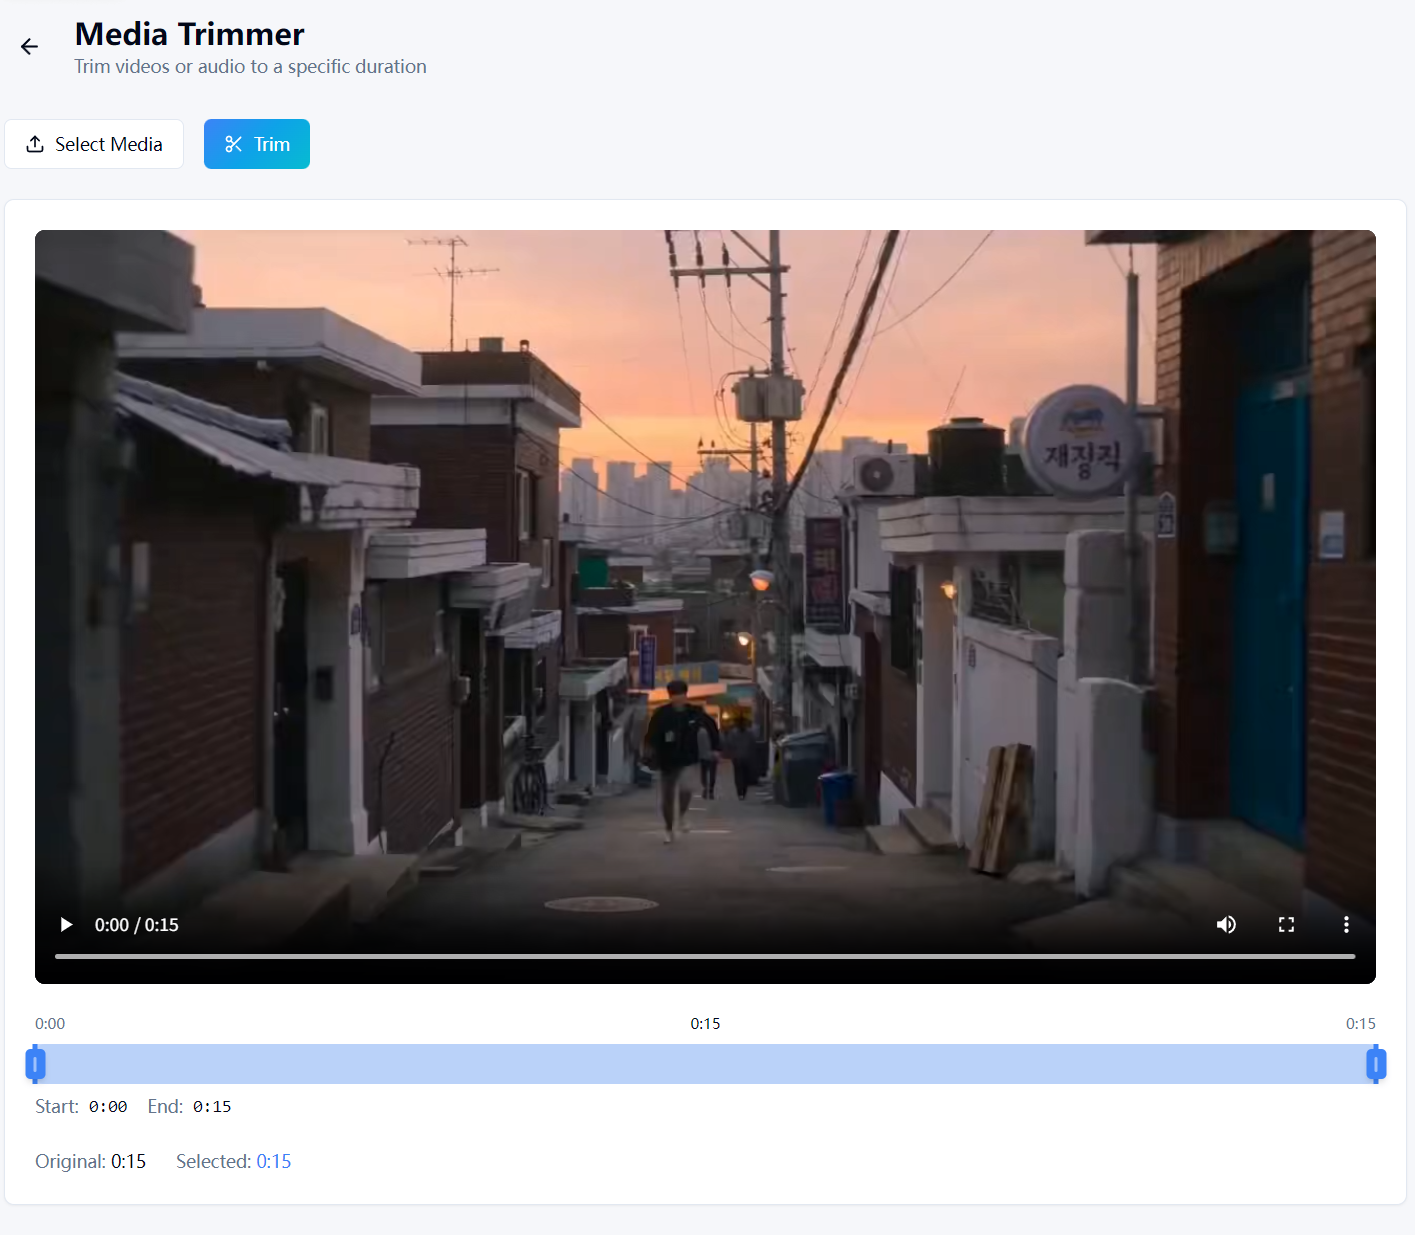
WaveSpeed Desktop includes a built-in Media Trimmer with a visual timeline:
- Drag and drop your video
- Use the visual slider to set start and end points
- Click trim — done
No timestamp math. No keyframe headaches. No terminal.
Download WaveSpeed Desktop for free: https://github.com/WaveSpeedAI/wavespeed-desktop/releases
FAQ
What’s the difference between -t and -to?
-t specifies duration (e.g., -t 30 means 30 seconds). -to specifies the end timestamp (e.g., -to 00:02:30 means stop at 2:30).
Can I trim without losing quality?
Yes—use -c copy to avoid re-encoding. The tradeoff is that cuts may not be frame-accurate (they snap to the nearest keyframe).
How do I find the exact duration of a video?
ffprobe -v error -show_entries format=duration -of csv=p=0 input.mp4Can I trim multiple files at once? Not in a single command. You’d need a shell loop for each file. WaveSpeed Desktop supports batch trimming with drag-and-drop.
Related Articles

How to Use Qwen Image 2.0: Text-to-Image, Editing & Text Rendering Guide (2026)

How to Convert Images to JPG, PNG, WebP, GIF with FFmpeg (2026 Guide)

How to Convert Audio to MP3, AAC, FLAC, WAV with FFmpeg (2026 Guide)

How to Convert Video to MP4, WebM, MOV with FFmpeg (2026 Guide)

How to Merge and Concatenate Videos with FFmpeg (2026 Guide)
