Kling AI Motion Control: How It Works + How to Use It on WaveSpeed

Hey guys. Real talk, I didn’t set out to learn Kling AI Motion Control. I just wanted a short clip of a cup sliding across a table without the camera drifting like it was on a boat. Two tries in, I realized the model was eager, too eager, to add flair. The motion felt floaty. That small annoyance pulled me into a week of tests, a handful of failed renders, and a few clear patterns I wish I knew earlier.

What “Motion Control” actually means
When people say “Kling AI Motion Control,” they often mean three things at once:
- You guide a subject’s movement over time (walk, slide, turn, gesture).
- You keep the camera behavior consistent (locked, dolly-in, slow pan) so the scene doesn’t jitter.
- You limit the model’s urge to improvise with props, lighting, or physics.
In practice, motion control is less like keyframing in After Effects and more like setting lanes on a road. You don’t get precise coordinates for every frame, but you can narrow the path so the model stays close to what you described.
 What surprised me: good motion control is mostly about reducing ambiguity. If the prompt leaves space, the model fills it, usually with camera moves. If you’re explicit about the camera and background, your subject’s movement becomes more predictable. When I wrote “tripod, fixed camera, no zoom” early in the prompt, drifting dropped a lot. Not gone, but manageable.
What you can / can’t control (parts, camera, pose)
What I could control reliably
- Camera discipline. Saying “tripod shot, fixed camera, no zoom, no dolly” helped more than any other line. If you want a move, say exactly one: “slow right-to-left pan, constant speed.” Mixing multiple moves confused it.
- Coarse subject motion. Verbs plus speed words work: “walks slowly,” “glides steadily,” “turns 90 degrees,” “raises right hand to wave.” Adverbs like “gently” were interpreted better than numbers like “0.5 m/s.”
- Pose at anchor moments. I had better luck describing pose at time slices: “At start: neutral stance. Midway: right hand lifts to shoulder height. End: hand lowers.” The model interpreted these as beats.
What stayed slippery
- Fine-grained limb paths. “Elbow at 45°” usually didn’t stick. “Elbow tucked close” worked better.
- Micro-timing. If you need a hand wave to start exactly at 1s, expect some drift. I got closer by anchoring beats (“by the middle…”, “in the final third…”), not absolute seconds.
- Physics-perfect collisions. Sliding objects sometimes felt frictionless. Adding surface detail (“rough oak tabletop, visible grain”) helped a bit, but it’s not a physics engine.
If you’re coming from ControlNet or MoCap land: Kling accepts conditioning (pose, masks) in some wrappers, but plain text plus careful negatives took me 80% of the way for simple shots.
WaveSpeed setup (model + preset)
I kept seeing a “WaveSpeed” preset in a couple of UIs that sit on top of Kling. Names vary across wrappers, but the idea was consistent: favor smoother velocity curves over showy camera motion. When I paired the current Kling video model with a WaveSpeed-style preset, I got steadier subject movement and fewer micro-zooms.
My baseline setup:
- Model: latest Kling video/motion model available in the dashboard at the time of testing.
- Preset: “WaveSpeed” or any preset that mentions stable motion, constant speed, or tripod bias.
- Motion emphasis: medium. High sometimes over-suppressed texture changes: low let the camera wander.
If your UI doesn’t have “WaveSpeed,” look for a toggle like “Smooth velocity,” “Constant motion,” or “Camera stabilizer.” It’s the same intent under different names.
For setups like this, we use our own WaveSpeed — it keeps motion steady, presets consistent, and reduces retries. This is exactly how our team handles Kling AI Motion Control.
Step-by-step workflow
Here’s the path that produced the fewest retries for me.
- Frame the shot in words
- Start with camera: “Tripod, fixed camera, no zoom.” Or name one deliberate move. Put this in the first sentence.
- Lock the background: “Plain studio backdrop,” “daylight kitchen, static,” “empty hallway, no extras.” Reduces churn.
- Describe the subject and identity
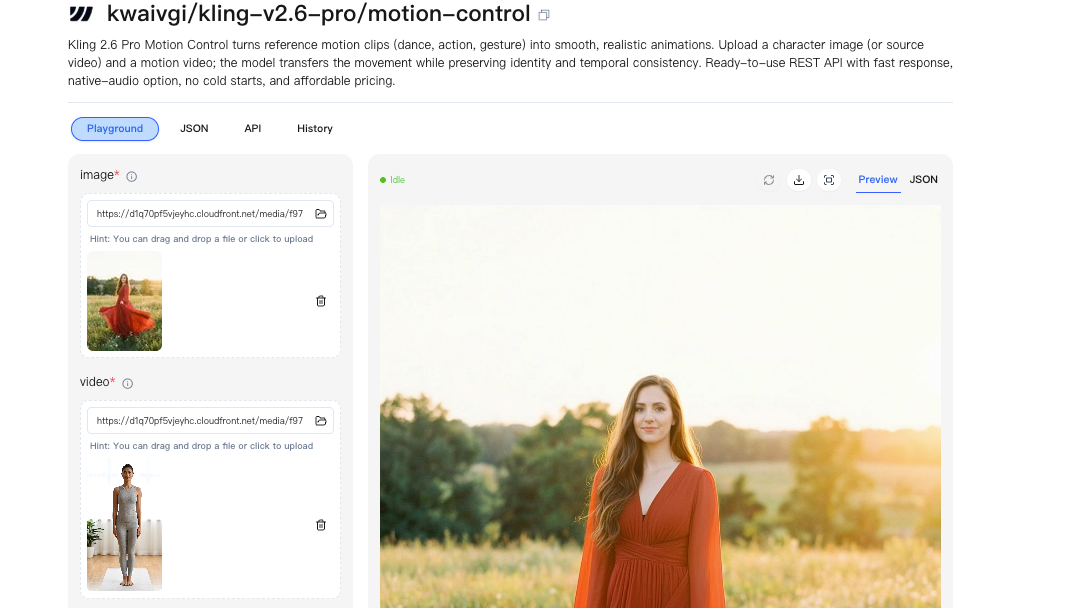
- One clear subject identity with 2–3 anchors: clothing, color palette, a prop. If you have a reference image, use it.
- Specify motion in beats
- Start / middle / end. Use verbs + speed words. Avoid mixing multiple actions in the same beat.
- Add negatives that protect motion
- “No camera shake, no zoom, no cut, no time-lapse, no teleporting.” It reads silly, but it works.
- Set duration & aspect before rendering
- I stayed around 4–6 seconds for tighter control. Longer clips invited drift.
- Do a low-res/quick pass
- If your UI allows draft mode, test motion at low resolution first. I caught 70% of issues this way.
- Iterate with small edits
- Change one variable per run: camera, speed word, or a single beat. Big prompt edits caused big unpredictability.
- Lock a good seed
- When a take is close, lock the seed and nudge from there. Otherwise, you end up chasing ghosts.
This didn’t always save me wall-clock time, but it reduced the mental load. Fewer “what changed?” moments.
Prompt structure template
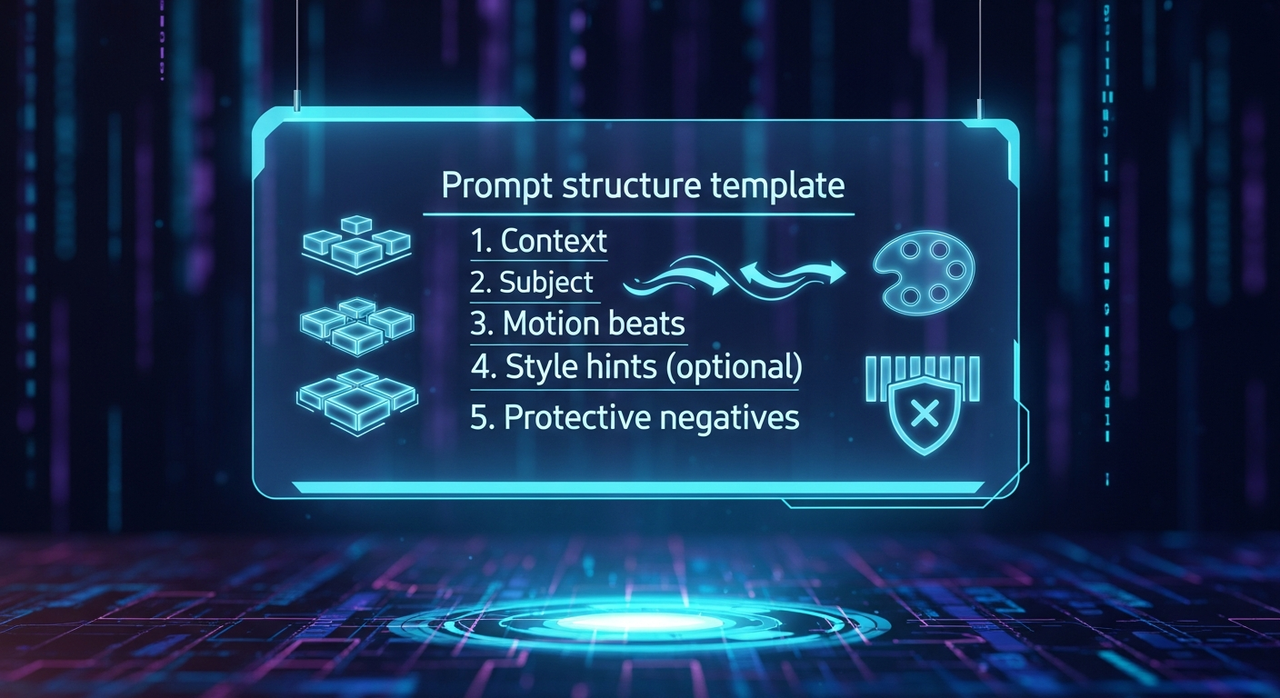 I use a simple scaffold and fill the blanks. Copy it, tweak it, ignore what you don’t need.
Context
- Camera: [tripod/fixed OR one clear move]
- Background: [short static description]
- Duration: [X seconds], [aspect ratio]
Subject
- [who/what], [2–3 identity anchors]
Motion beats
- Start: [pose/action]
- Middle: [pose/action]
- End: [pose/action]
Style hints (optional)
- [lighting], [texture detail], [realistic vs stylized]
Protective negatives
- no camera shake, no zoom, no cut, no time-lapse, no motion blur exaggeration, no extra characters
This format made Kling AI Motion Control behave more like a steady assistant and less like an improv partner.
5 copy-paste examples
Short, practical, and tested. Replace details, keep the bones.
1. Product glide on table (tripod)
Camera: tripod, fixed camera, no zoom. Background: clean oak tabletop, soft daylight. Duration: 5s, 16:9.
Subject: white ceramic mug with a blue stripe.
Motion: Start: mug at left, still. Middle: mug glides to center, steady speed. End: mug stops at center, gentle ease-out.
Style: realistic, subtle reflections, soft shadows.
Negatives: no camera shake, no time-lapse, no tilts, no extra props.
2. Human wave, simple timing
Camera: tripod, fixed, eye-level. Background: plain studio gray. Duration: 4s, 9:16.
Subject: person in a green hoodie, curly hair, neutral expression.
Motion: Start: arms down. Middle: right hand lifts to shoulder height and waves twice, small motion. End: hand lowers, neutral stance.
Style: soft key light, natural skin tone.
Negatives: no zoom, no cut, no background characters, no head turn.
3. Slow pan with walking subject
Camera: slow right-to-left pan, constant speed. Background: quiet city sidewalk, early morning. Duration: 6s, 16:9.
Subject: adult with a red backpack, denim jacket.
Motion: Start: subject enters frame right, walking slowly. Middle: steady walk, eyes forward. End: exits frame left as pan finishes.
Style: grounded realism, gentle contrast.
Negatives: no jump cuts, no lens breathing, no running.
4. Hand demo over desk
Camera: top-down, fixed camera, no zoom. Background: wooden desk with cutting mat. Duration: 5s, 1:1.
Subject: right hand places a black pen.
Motion: Start: empty desk. Middle: hand enters from bottom, places pen, rotates 90°. End: hand exits, pen remains.
Style: crisp, minimal shadows, clear edges.
Negatives: no extra tools, no jitter, no color shifts.
5. Logo card pull
Camera: tripod, fixed, close-up. Background: neutral paper backdrop. Duration: 4s, 4:5.
Subject: small card with [your logo].
Motion: Start: card off-frame bottom. Middle: card slides up into center and holds. End: slight settle, no bounce.
Style: clean, realistic texture, macro feel.
Negatives: no parallax, no camera push-in, no extra text.
Common failures + fixes

- Camera creep (micro-zooms or tiny tilts)
Fix: Put “tripod, fixed camera, no zoom” in the first line. Add “no dolly, no pan” if you want total lock. If it persists, shorten duration or simplify background. - Motion too floaty
Fix: Use “steady speed,” “gentle ease-out,” or name a surface with friction (“rough linen, grippy rubber mat”). Sometimes switching to a WaveSpeed-like preset helped. - Identity drift across frames
Fix: Stronger identity anchors (specific clothing, colors), or use a reference image. Lock seed once it’s close. Avoid adding new props mid-iteration. - Background jitter
Fix: Fewer background details. “Plain wall” beats “café with people moving.” If you need a lively backdrop, accept some motion variance or shorten the clip.
Best export settings
If you’re moving clips into editors (Premiere, Resolve, FCP), a clean export saves a lot of re-encoding.
- Duration: keep first passes short (4–6s). Stitch later.
- Resolution: generate at or near target delivery. Upscaling after the fact is fine, but avoid double-scaling.
- Frame rate: 24 fps for cinematic feel, 30 fps for product/UI demos, 60 only if you truly need it. Consistency matters more than the number.
- Codec/container: ProRes 422 HQ or DNxHR for editing; H.264 High Profile for quick sharing. If the tool forces H.264, set a higher bitrate to avoid banding (e.g., 15–20 Mbps at 1080p, 35–50 Mbps at 4K).
- Color: lock your color space. If the UI offers sRGB/Rec.709, pick one and keep it through your pipeline.
I also keep the original seed and prompt in the filename or sidecar text. Six renders later, you’ll thank past-you.
There you have it—my hard-won Kling AI Motion Control wisdom, distilled from one rogue cup and too many coffee-fueled nights. Now it’s your turn: what’s the weirdest “flair” Kling added to your clip? Reply below!
Related Articles
Claude Sonnet 4.6: A “Non-Hogging the Spotlight” Work Model

Z-Image-Base API Comprehensive Guide: CFG + Negative Prompt Practical Application

Z-Image-Turbo Inpainting API: Mask Workflow + Artifact Fixes

Genie 3 World Models: How They Generate Interactive Environments

GLM-5 for AI Image & Video Prompt Orchestration