Real-ESRGAN Explained: How It Works and When to Use It
Hey, it’s Dora here!Today we’ll talk about Real-ESRGAN. I first noticed Real-ESRGAN in late 2022 when I kept seeing it pop up in project notes and GitHub stars for modest, practical upscaling tasks. I wasn’t looking for a flashy demo, I wanted something that could quietly make low-res screenshots, old photos, and compressed thumbnails usable without a lot of tinkering. I’ve spent time running it on desktop builds and short video clips, and this is what I now reach for when I need an honest, open-source upscaler that tolerates messy inputs.
What Real-ESRGAN actually is
Enhanced Super-Resolution GAN, what that means
Real-ESRGAN stands for “Enhanced Super-Resolution Generative Adversarial Network.” At its core it’s a neural model trained to predict higher-resolution images from lower-resolution inputs. The “enhanced” part matters: the authors built on earlier ESRGAN work but focused on making the model robust to real-world degradation, compression artifacts, noise, blur, not just artificially downsampled photos.
I like thinking of it as a restoration-first upscaler. Instead of assuming every low-res image is a clean, perfectly downsampled version of a high-res original, it expects the input to be messy. That expectation shapes how it was trained and how it performs in practice.
Why it became the go-to open-source upscaler
What made Real-ESRGAN stick for me was balance. It’s not the fanciest-looking model, but it’s practical: available as code, packaged in community builds, and relatively light to run compared with some research models. From my tests , three things stood out: sensible defaults, a community of maintained models (including variants trained for faces or anime), and predictable results across a range of degraded images.
Predictable is underrated. When you’re juggling content deadlines, a tool that behaves consistently beats one that occasionally dazzles.
What caught me off guard, briefly, was how often a single pass would be “good enough” for social posts or drafts, saving me a roundtrip to a heavier editor.
How Real-ESRGAN works
Degradation pipeline explained simply
Training a model to restore images requires examples. Real-ESRGAN uses a degradation pipeline to create those examples: starting from a clean high-res image, it applies a mix of blurs, noise, JPEG compression, and downsampling, often in random order. The model then learns to invert that process: given the degraded image, predict the cleaner, higher-resolution version.
I like the pipeline metaphor: they don’t just shrink images uniformly. They simulate the kinds of damage you see in screenshots, old scans, or phone photos taken in poor light. That variety is why the model generalizes better to real inputs.
Why it handles real-world noise better than predecessors
Earlier super-resolution models assumed the same simple downsampling step for training. That makes them brittle: great on ideal test data, weaker with real noise. Real-ESRGAN’s training set intentionally mixes distortions. In practice, that means it’s more forgiving of blocky JPEGs, chroma noise, and motion blur. It’s not magic: sometimes it invents texture where none existed. Still, it tends to produce fewer obvious artifacts and more plausible detail than models trained only on clean downsampling.
What Real-ESRGAN is best for
Image upscaling use cases
I reach for Real-ESRGAN for quick fixes: making small product photos readable, lifting screenshots for documentation, and restoring old family snapshots before a deeper edit. It’s particularly handy when you need better detail without spending time on manual noise reduction.
In my workflow, a 2x–4x pass often removes visual friction, text becomes legible, faces read better, and compressed edges soften in a useful way.
Video upscaling use cases
I also use Real-ESRGAN for short video clips and GIFs. It’s not a dedicated temporal model, but frame-by-frame upscaling can work when you don’t need perfect frame coherence. For short clips, livestream highlights, or archival footage where a few frames of jitter are acceptable, it’s a practical solution. I usually pair it with a simple frame-stabilization pass to reduce flicker.
Where it still struggles
It struggles with fine, repetitive textures (like dense foliage) and with heavy motion blur. It will sometimes hallucinate plausible-looking details that are wrong. For cinematic restoration, film grain preservation, or long-form video where temporal consistency matters, I don’t rely on Real-ESRGAN alone.
How to get started
Download and install
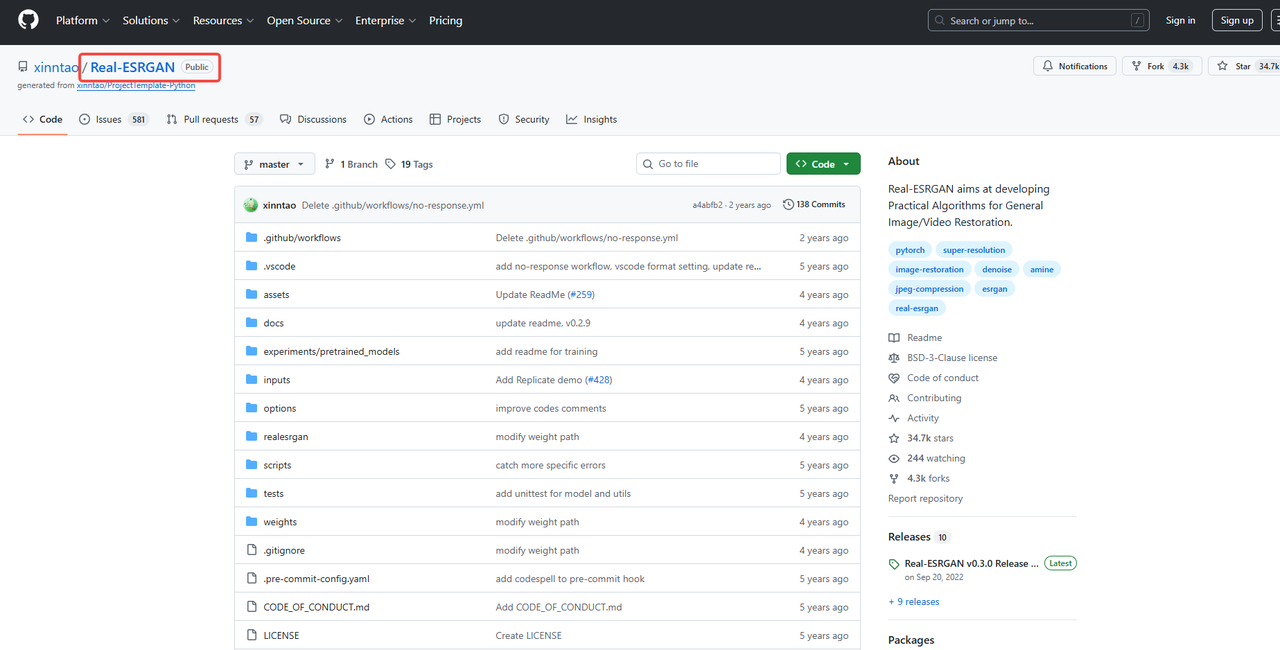
If you prefer local control, download and install the official release or a community fork: see real-esrgan-download for links and packages.
Run via API (no local setup needed)
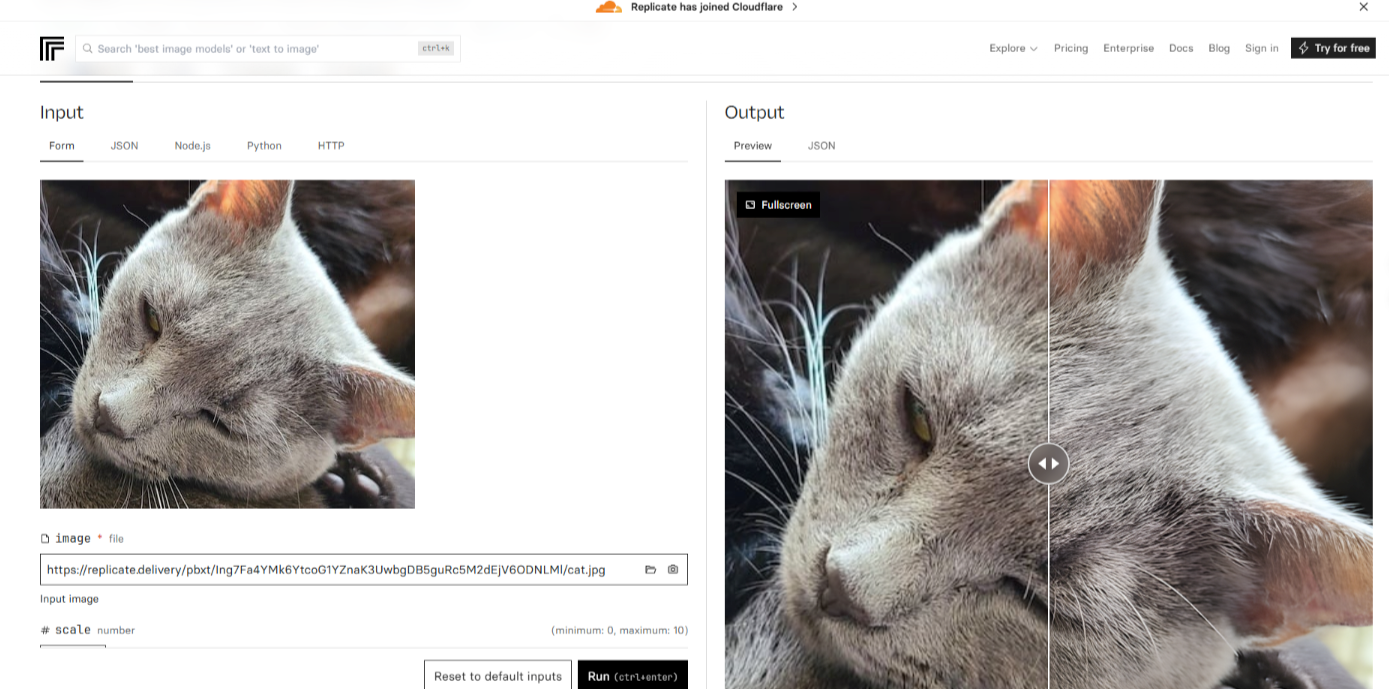
You can also use hosted services and simple APIs to run Real-ESRGAN without installing anything— for example on Replicate.. That’s what I do when I need a quick test or when my laptop’s GPU isn’t available. Latency and cost matter here: small batches are cheap and fast, but scaling hundreds of images changes the math.
Real-ESRGAN vs alternatives
vs Topaz
Topaz tends to give smoother, more polished results out of the box, but Real-ESRGAN is a flexible open-source option worth comparing, see real-esrgan-vs-topaz for a hands-on side-by-side.
vs cloud API upscalers
Cloud upscalers (commercial APIs) often add batching, model selection, and temporal smoothing for videos. They can be more consistent for production pipelines, and sometimes they include human-curated presets. Real-ESRGAN, by contrast, gives you control and transparency: you can run specific model variants, tweak parameters, and see the weights. That matters when you want predictable, repeatable behavior without vendor lock-in.
In short: choose the cloud when you need scale and support: pick Real-ESRGAN when you want control and low-cost experimentation.
Choosing the right approach for your use case
For me, the choice comes down to trade-offs. If I’m fixing a handful of messy images for notes or social posts, Real-ESRGAN’s local runs are fast, cheap, and good enough. If I’m preparing a long video or need strict temporal consistency, I lean toward commercial tools or dedicated temporal models.
A practical rule I use: try Real-ESRGAN first for a sample set. If the results feel consistent and the artifacts are acceptable, stick with it. If you need tighter fidelity or worry about hallucinated detail, consider a paid upscaler or an editor-assisted workflow.
I don’t expect a single tool to solve everything. What matters more to me is fitting the tool to the task and accepting small imperfections when the time and budget call for it. One last thought: the best part of an open tool like Real-ESRGAN is that it invites iteration. I’ll keep testing new model variants as they appear, and I suspect you’ll find a version that fits your own quirks and constraints too.
FAQ
What is Real-ESRGAN and how does it work? Real-ESRGAN (Enhanced Super-Resolution Generative Adversarial Network) is a neural network model designed to upscale low-resolution images by predicting higher-resolution versions. Unlike traditional upscaling models, it is trained to handle real-world noise, compression artifacts, and blur, making it more effective for real-world images. It uses a degradation pipeline to simulate common image distortions, enabling it to restore and enhance images in a more practical and forgiving way.
How does Real-ESRGAN compare to other image upscaling tools like Topaz? Topaz typically provides smoother, more polished results out of the box, but Real-ESRGAN offers more flexibility as an open-source tool. While Topaz might be easier for users looking for a polished solution, Real-ESRGAN provides transparency, allowing users to tweak parameters and choose specific model variants. This makes Real-ESRGAN ideal for experimentation and control, whereas Topaz is better suited for users looking for ready-made solutions with minimal setup.
What are the best use cases for Real-ESRGAN? Real-ESRGAN is great for quick fixes like upscaling small product photos, improving screenshots for documentation, and restoring old family photos. It’s particularly useful when you need enhanced detail without the need for heavy noise reduction. Additionally, it works well for video upscaling, particularly for short clips or archival footage, although it’s not designed for temporal consistency or long-form video restoration.
What limitations should I be aware of when using Real-ESRGAN? While Real-ESRGAN handles noise and compression artifacts well, it struggles with fine, repetitive textures such as dense foliage and heavy motion blur. In some cases, it may generate plausible-looking details that are actually incorrect. It’s also less suitable for cinematic restoration, film grain preservation, and videos requiring strict temporal consistency, such as long-form films.
How can I get started with Real-ESRGAN? You can either download and install Real-ESRGAN locally, or use hosted services and APIs for quick access without installation. If you’re just testing or don’t have access to a GPU, cloud-based services like Replicate offer an easy way to run Real-ESRGAN. For larger-scale usage or batch processing, you may need to account for latency and cost, but the flexibility and control offered by Real-ESRGAN make it a great option for low-cost experimentation.
Related Articles

LTX-2.3 API Guide: 7 Endpoints, Access Options & Production Use
LTX-2.3: What's New in Lightricks' 22B Video Model (2026)
WaveSpeedAI vs Media.io Watermark Remover: Which One Actually Delivers?

Goodbye Sora: Top 5 Best Sora Alternatives for Making AI Videos in 2026

Google Veo 4: What We Might See From Google's Next AI Video Model