WaveSpeed Pricing Explained: How Billing Works + Cost Examples (2026)

The first time I opened the Wavespeed pricing API docs (Jan 2026), I wasn’t trying to “optimize spend.” I just wanted to stop guessing. I had a folder of images to process and no clear sense of what 100 requests vs. 1,000 would cost me next week. That small doubt—am I about to run up a bill?—was enough to make me pause.
So I spent an afternoon wiring a tiny script that calls the pricing endpoint before I queue anything big. Nothing fancy. Just a way to predict the bill, set a soft limit, and avoid the late-night “why is my usage spiking?” scramble. Here’s the shape of the model as I understand it, plus the practical bits that made it usable for real work.
Pricing Model Overview

What you pay for (units / credits / requests)
When I price a batch with the Wavespeed pricing API, I think in three parts:
- Requests: Each API call has a base cost. Simple, easy to reason about.
- Work units: Image size, steps, or compute intensity add variable cost on top of the base. Larger or more complex jobs use more units.
- Model tier: Some models are pricier. If I switch from a “standard” model to a “pro” or “research” model, the multiplier moves.
In practice, I treat it like a small formula:
Estimated cost ≈ (base per request) + (work units × unit rate) × model multiplierManaging Wavespeed API Costs (Jan 2026)
I don’t memorize the numbers. I fetch them. The pricing endpoint returns current rates, which matters because anything I hard‑code will drift over time. When I compared a few sample responses across two days, I didn’t see changes, but I still pull fresh rates at runtime.
A small note: the API’s “units” label maps to different things depending on the feature—pixels processed, tokens, steps, etc. The important bit is consistency within each feature. Once I understood the mapping for images, estimating stopped feeling like a guess.
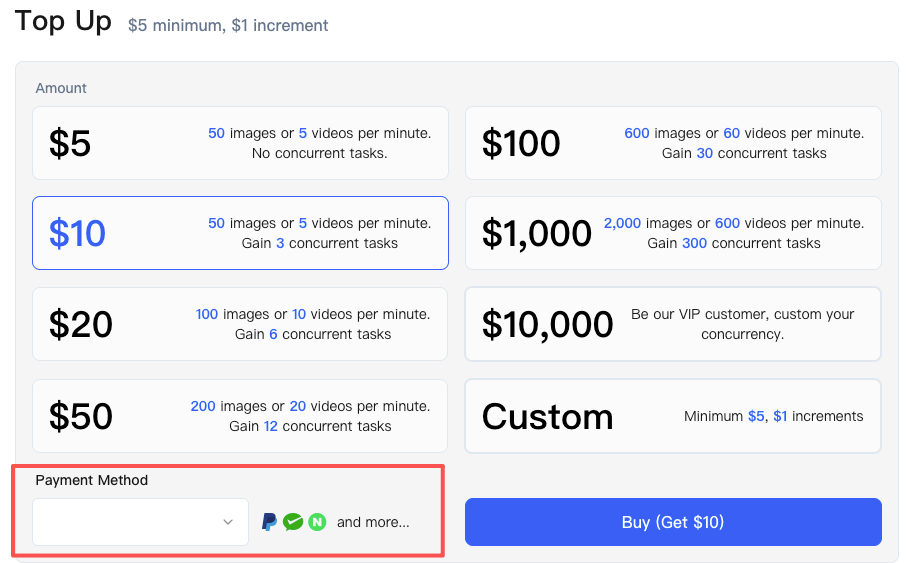
Billing Cycle and Payment Methods
 For billing, the pattern is familiar: charges accrue as you go, then settle on a monthly cycle. I keep an eye on two timestamps: the usage window (UTC) and the invoice date. Knowing both helps me avoid end-of-month surprises.
Payment methods looked standard (card on file, optional credit balance, larger plan invoicing). I use a card. I also add a small credit buffer before large runs: it keeps jobs from failing mid-batch if the card hiccups. Nothing dramatic, just a little cushion that makes queues less fragile.
What Changes Cost
Image Size Impact
This is the one that bit me first. Doubling width and height doesn’t just double cost—it roughly quadruples it because you’re increasing total pixels. If cost is tied to pixels processed (it usually is), scaling from 512×512 to 1024×1024 can multiply the variable portion by ~4.
My rule now: Lock the smallest acceptable size for the job and stick to it. Prototype at a lower resolution to validate prompts or settings, then do a final pass at the target size.
Model Selection Impact
 Switching models is like changing lanes on a toll road. The base fee might stay similar, but the multiplier moves. “Standard” tiers tend to be predictable and cheaper; “pro” or specialty models add cost per unit, sometimes noticeably. Quality gains are real in some cases, but only upgrade models when a test image actually shows the difference you need. If it’s not visible to the end user, don’t pay for it.
Batch vs Single Request
Batching usually helps. You can amortize overhead across multiple items and reduce per-request base costs. But if one item in a giant batch fails, you need to know how the platform bills partial successes. I had better luck with modest batch sizes—big enough to reduce overhead, small enough that a retry doesn’t feel expensive or risky. Ten to twenty images per batch hit a nice middle for me.
Cost Estimation Examples
I like to test with round numbers. These are not official rates, just a clean way to reason about scale. Always fetch live prices when running scripts.
 Assumptions for illustration only:
- Base per request: $0.002
- Unit rate (per megapixel processed): $0.003
- Model multipliers: standard = 1.0, pro = 1.5
- Image sizes: 512×512 ≈ 0.26 MP, 1024×1024 ≈ 1.05 MP
100 Images Scenario
Standard model, 512×512, batched in groups of 20.
- Variable cost: 0.26 MP × $0.003 ≈ $0.00078 per image
- Base amortized: $0.002 ÷ 20 ≈ $0.0001 per image
- Estimated per image: ~$0.00088
- 100 images ≈ $0.088
Observation: Base fee fades when batching; resolution choices matter more than anything else.
1,000 Images Scenario
Pro model, 1024×1024, batched in 25s.
- Variable cost: 1.05 MP × $0.003 × 1.5 ≈ $0.004725 per image
- Base amortized: $0.002 ÷ 25 ≈ $0.00008 per image
- Estimated per image: ~$0.00481
- 1,000 images ≈ $4.81
Observation: Moving from standard to pro impacted total more than batching tweaks. Resolution jump was the main driver.
10,000 Images Scenario
Mixed sizes: 70% at 512×512 (standard), 30% at 1024×1024 (pro), batched in 50s.
- 7,000 small images: (0.26 MP × $0.003 × 1.0 + $0.002/50) ≈ $0.00084 per → ~$5.88 total
- 3,000 large images: (1.05 MP × $0.003 × 1.5 + $0.002/50) ≈ $0.00473 per → ~$14.19 total
- Total ≈ $20.07
Observation: Mixed workloads amplify the need for presets. Label jobs by size and model tier to forecast quickly and justify costs.
Budget Controls
Spending Caps and Alerts
The simplest safety net I set up was a soft cap. Store a monthly budget in an environment variable and check cumulative estimates before enqueueing more work. If the total crosses the threshold, the script pauses and pings you. It’s not clever, just a guardrail.
Platform-level controls like account spending caps and email/webhook alerts are useful too. I use both: platform alert for the big picture, my own script for job-level decisions.
Batching Strategies for Cost
- Batch by size and model. Mixing muddies estimates and slows troubleshooting.
- Cap batch size to reduce painful retries: 20–50 items per batch works well.
- Warm up with a tiny batch first. It surfaces configuration issues for pennies.
- Use a “draft” pass at lower resolution if quality checks are subjective. Approvals are cheaper at 512×512. None of this is novel. It’s just the difference between a quiet, predictable bill and a noisy one.
Common Billing Questions
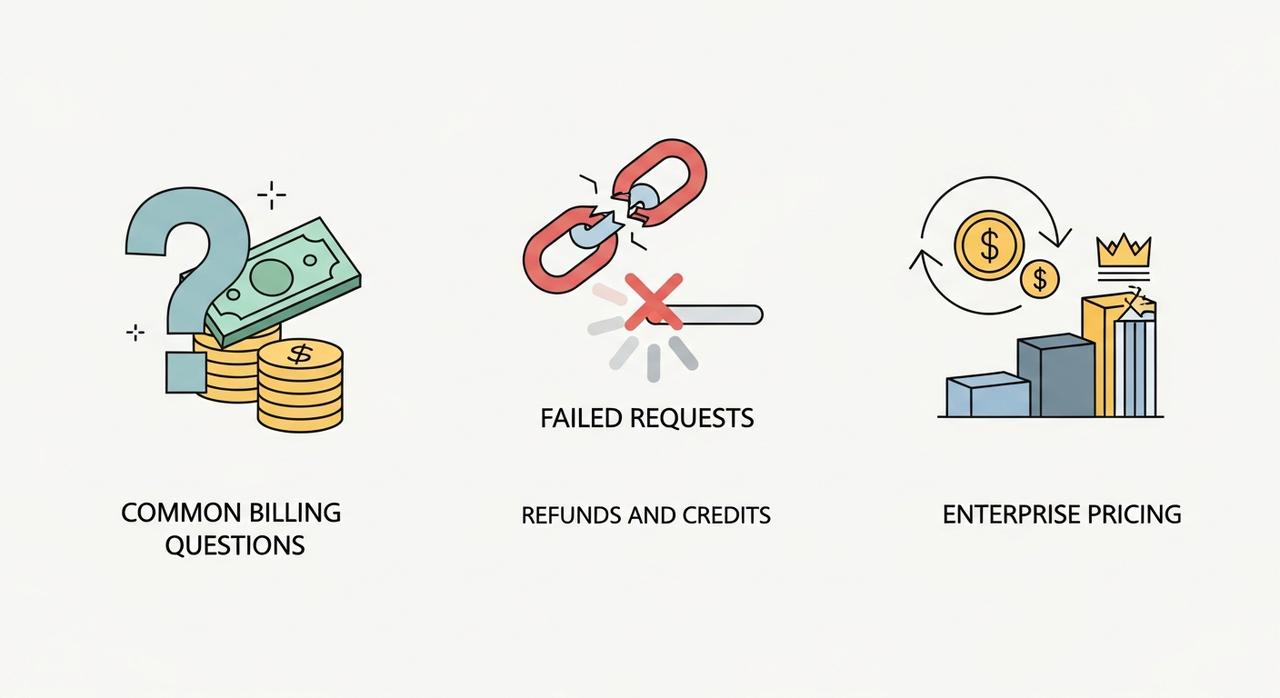
Failed Requests
Hard failures returning an error code generally don’t bill the variable portion, but may incur a minimal base fee. Partial outputs or timeouts can be platform-dependent—test with a small controlled batch if your workload is sensitive.
Refunds and Credits
Platform errors may be credited—keep request IDs and timestamps handy. Mistakes on your side (bad inputs, oversized images) are treated as learning costs.
Enterprise Pricing
High-volume users or custom SLAs usually unlock better unit rates and invoicing. Ask: does negotiated pricing offset procurement hassle? If consistently near that threshold, consider upgrading; otherwise, standard plans with live estimates suffice.
For quick budget estimation before bulk generation, you can also use WaveSpeed AI’s tool to obtain a reference range (pricing subject to official page).
In short, these small habits transformed me from someone who dreaded skyrocketing bills to someone who can generate in bulk with confidence. Hope this helps you run tasks predictably too!
Related Articles

GPT-5 Model Versions Explained: From GPT-5 to GPT-5.4

How to Remove Sora Watermark: Best Methods

GPT-5.4 for Developers: What the Leaked Signals Mean for AI Workflows

SkyReels V4 Use Cases: 6 Ways Creators Can Use It Right Now

GPT-5.4 Release Date: What the Signals Say
