Twitter Video Upscaler: Improve X Video Quality
Long time no see, I’m Dora. I noticed something annoying a few months back. I’d edited a clean 1080p clip — good lighting, steady shot, tight color grade — uploaded it to X, and watched it turn into a soft, blocky mess in the feed. The kind of quality you’d expect from a 2009 iPhone video. That bothered me enough to actually dig into why it happened, and …whether a twitter video upscaler could do anything useful about it. If you’re comparing different AI video workflows beyond just upscaling, this overview of how AI video face swap tools fit into real editing pipelines gives a broader picture of what’s actually usable today.
Here’s what I found.

Why Twitter/X Video Looks Worse After Upload
Compression Specs and What They Destroy
Twitter applies heavy re-encoding to every video you upload. It doesn’t just store your file — it processes it. The result is a version tuned for fast playback across slow connections and old devices, not for visual fidelity.
According to the X Developer Platform’s official media best practices, the recommended upload resolution is 1280×720 for landscape video. Non-premium accounts receive 720p playback at best. Even premium subscribers who upload 1080p content get it re-encoded by the platform’s pipeline before delivery.
What gets hurt most in that process:
- Fine textures — skin, fabric, foliage — go soft or smear
- Motion blur becomes exaggerated, especially in fast-paced shots
- Dark areas develop visible blocking artifacts from aggressive chroma compression
- Thin text and graphics often become unreadable at lower bitrate
The platform targets a bitrate range that keeps files small. Crisp detail costs bits, and Twitter isn’t generous with them.
What Upscaling Can and Can’t Recover
This is where I want to be honest, because a lot of marketing around upscaling tools overpromises.
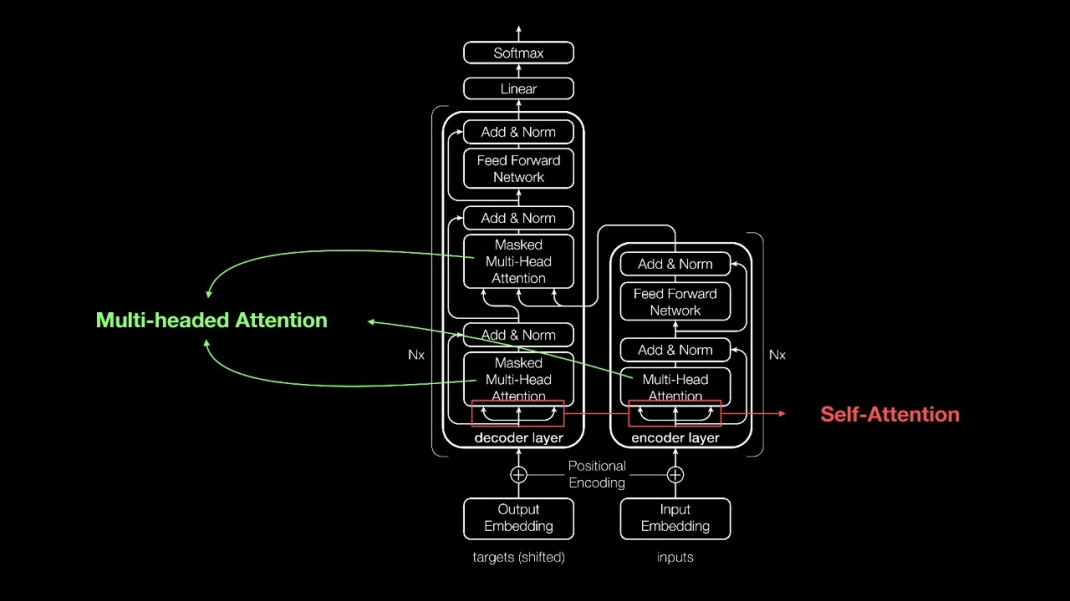
Upscaling works by using AI models trained on large amounts of high-resolution footage. As NVIDIA explains in their breakdown of AI upscaling, these models don’t just enlarge pixels — they predict what higher-resolution detail should look like, based on learned patterns from training data. That’s meaningfully different from old bicubic stretching.
What it can help with: sharpening soft edges before upload, recovering detail from a lower-resolution source file, and reducing compression artifacts in the pre-upload version.
What it can’t do: manufacture information that was never captured. If the original footage is blurry because of camera shake or poor lens focus, upscaling fills in texture that wasn’t there. Sometimes this looks fine. Sometimes it looks wrong in a way that’s hard to pinpoint. And critically — Twitter re-encodes everything anyway, so any gain from upscaling can be partially undone at upload.
The goal isn’t magic. It’s giving Twitter’s encoder a richer source to work with. If you’re curious how different AI enhancement approaches compare in practice, this breakdown of Real-ESRGAN vs Topaz for video upscaling quality shows where each method actually performs better.
What You Need Before Upscaling
Original Resolution Requirements
Start with the highest-resolution source file you have. This sounds obvious, but it matters more than people expect. As the MASV guide to video upscaling points out, AI can enhance but it can’t truly invent from nothing — upscaling requires starting data to work with.
If your source is already 1080p, upscaling to 4K before exporting at 1080p for Twitter sounds redundant. But in practice, processing at a higher intermediate resolution before downscaling to the target can preserve edge definition better than processing directly at the target. It’s a detour worth taking if your upscaling tool supports it and your machine can handle the render time.
Minimum useful source resolution: 720p. Below that, results get inconsistent.
Which Upscaler Tools Work for This Workflow
A few options used consistently across video production workflows:
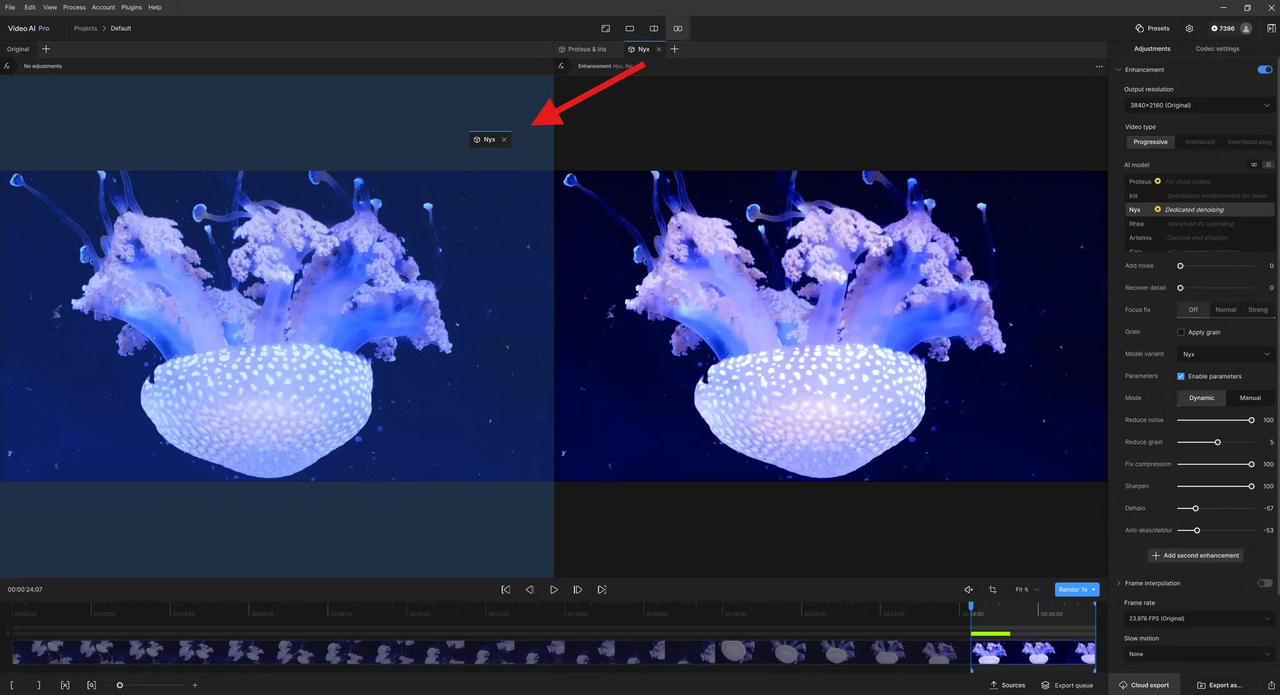
- Topaz Video AI — good results on motion content, runs locally
- DaVinci Resolve’s Super Scale — available in the free version, handles upscaling inside the edit/export pipeline without a separate step
- After Effects with Detail-Preserving Upscale — solid for frame-by-frame quality, slower on long clips
BorisFX has a practical walkthrough of how AI upscaling integrates with After Effects, which gives a useful sense of what the quality floor looks like in a professional context.
You don’t need the most expensive option. You need one that exports clean H.264 at the bitrate Twitter expects. For a simpler starting point, this guide to downloading and using Real-ESRGAN for video enhancement covers a lightweight workflow that works well for this use case.
Step by Step: Upscale and Upload to Twitter
Step 1 — Choose Your Upscale Target (Resolution + Format)
For Twitter, the practical ceiling is 1080p (1920×1080). Uploading above that doesn’t buy you better playback for most accounts, and the larger file size increases your chances of re-compression artifacts. If you’re a premium subscriber, 1080p is the useful target. For standard accounts, 720p is where quality stabilizes.
Target format: MP4, H.264 codec, AAC audio. Avoid HEVC/H.265 — Twitter accepts it in some cases but H.264 is more consistently reliable across devices and upload pipelines.
Step 2 — Export at Settings That Survive Twitter Compression
This step matters as much as the upscale itself. Twitter accepts up to 25 Mbps bitrate, but uploading at 25 Mbps doesn’t mean 25 Mbps playback — the platform re-encodes on its end regardless.
A practical export target:
- Resolution: 1920×1080 (or 1280×720 for standard accounts)
- Codec: H.264 High Profile
- Bitrate: 8–12 Mbps for 1080p
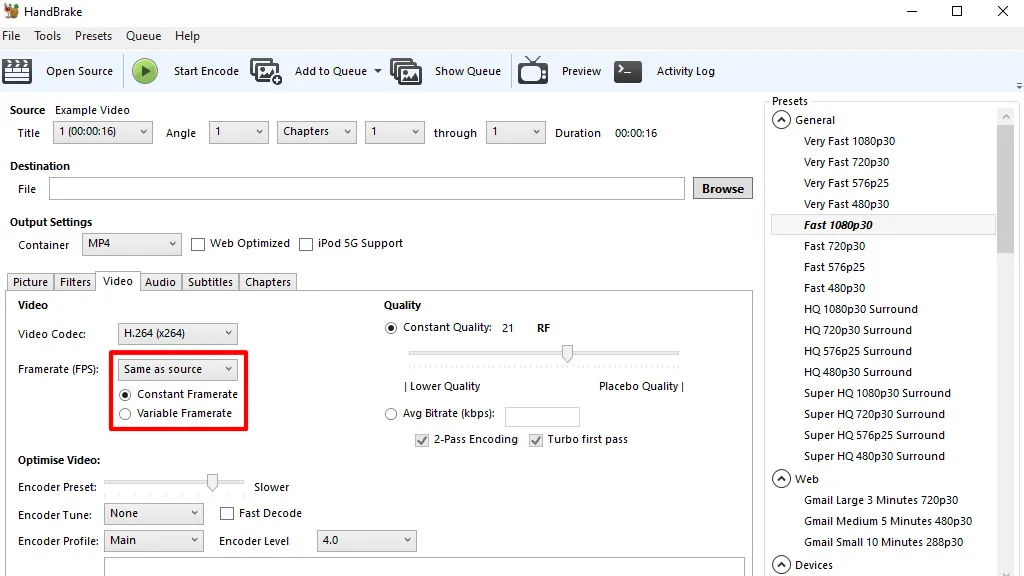
- Frame rate: 30fps constant — not variable. Twitter handles VFR inconsistently and it often causes soft playback
- Audio: AAC, 128–192 kbps, 44.1 kHz
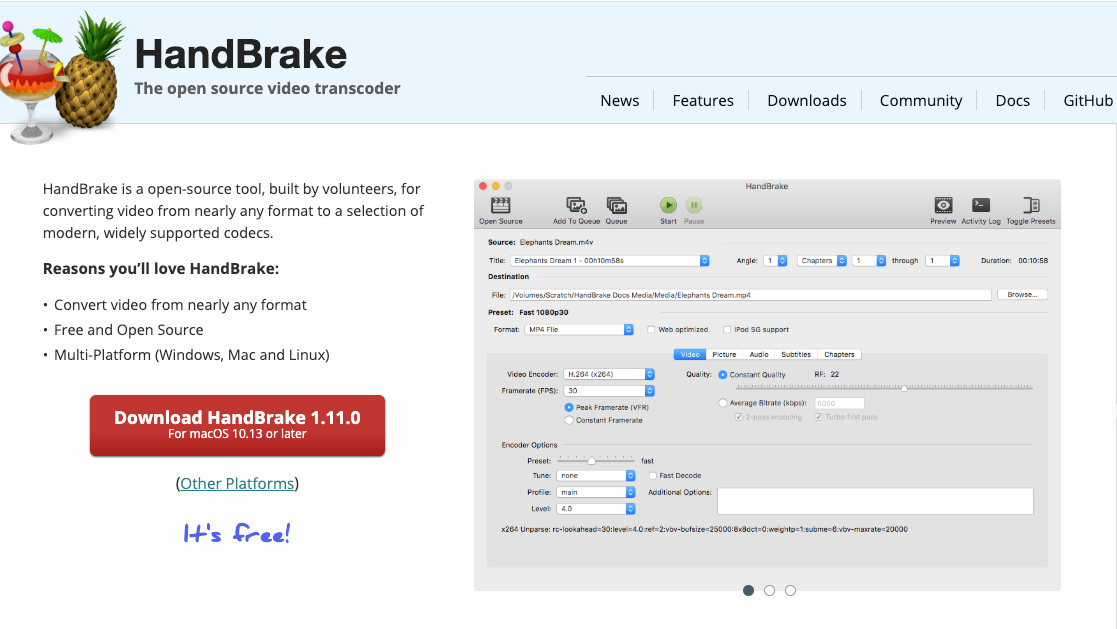
HandBrake is a free, open-source transcoder that handles these export settings reliably. The “Vimeo YouTube HQ 1080p30” preset is a decent starting point — then adjust bitrate upward for Twitter. It’s not glamorous software, but it does exactly what you need without hidden settings.
Step 3 — Upload and Quality-Check
Upload via web (x.com) rather than mobile when you can. Web uploads accept MP4 files up to 512MB for standard accounts and process through a more stable pipeline than the mobile app.
After upload, check playback on both desktop and mobile. The mobile compression path can differ from desktop. If the mobile version looks significantly worse — smearing on motion, color banding in gradients — the issue is usually variable frame rate or a bitrate that was too low for the scene complexity.
Give it 10–15 minutes. Twitter’s processing queue sometimes delivers a sharper version a few minutes after the initial state clears.
Common Mistakes That Waste the Upscale Step
Wrong Export Format
Uploading MOV from mobile, or using HEVC when H.264 is available. The format mismatch adds a re-encoding step you didn’t ask for. That extra pass costs you the quality you worked to preserve.
Upscaling Too Much and Triggering Re-Compression
Uploading a 4K file to Twitter expecting 4K playback — the platform doesn’t deliver 4K to most viewers. A 4K source at 50+ Mbps gets compressed more aggressively than a well-prepared 1080p file at 10 Mbps. The upscale step should end at the target delivery resolution, not above it. Bigger isn’t better here; calibrated is.
FAQ
Does Upscaling Really Survive Twitter Compression?
Partially. The quality gains from upscaling are partially preserved, not fully. The upscaled version gives Twitter’s encoder more texture to work with, which tends to result in softer-but-cleaner artifacts rather than blocky degradation. Whether that trade-off matters depends on your content — it’s more noticeable in talking-head video and product shots than in fast action clips.
What Format Survives Best?
MP4 with H.264, constant frame rate, uploaded via desktop. Every deviation from that introduces variables you don’t control. Not exciting advice, but consistent.
Does This Work on Mobile Uploads?
The upscaling step works regardless of how you shoot. But mobile upload paths apply additional compression compared to the web uploader. If quality matters, do the upscale on desktop, export the final file, and upload from the web interface. The extra steps are worth it for anything you want to look good.
I’m still not sure a twitter video upscaler is necessary for every creator workflow. If you’re posting short, fast-moving clips — the kind that get watched once in a feed and forgotten — the compression loss probably won’t register with your audience. But if you’re posting anything where texture, color, or fine detail carries meaning — product demos, interviews, visual art — the difference between a well-prepared source and a rushed upload is visible. Not dramatic. Just visible, in that quiet way that adds up.
The compression isn’t going anywhere. Twitter built it into architecture. Working around it carefully is about as much control as any of us have.
Related Articles

LTX-2.3 API Guide: 7 Endpoints, Access Options & Production Use
LTX-2.3: What's New in Lightricks' 22B Video Model (2026)
WaveSpeedAI vs Media.io Watermark Remover: Which One Actually Delivers?

Goodbye Sora: Top 5 Best Sora Alternatives for Making AI Videos in 2026

Google Veo 4: What We Might See From Google's Next AI Video Model