Z-Image-Turbo LoRA on WaveSpeed: Apply Custom Styles (Up to 3 LoRAs)
Hey, I’m Dora. Do you, like me, wanted my mockups to stop drifting off-brand, a blue that kept leaning teal, a logo mark that softened at the edges, a product photo that looked… almost right. Close is fine for drafts, but it adds noise. So last week, I tried LoRA with Z-Image-Turbo on WaveSpeed. Not to chase novelty, but to see if I could make “close enough” turn into “yep, ship it” without babysitting prompts.
These are my notes, what worked, where it snagged, and how I set it up so it stays out of the way once it’s dialed in.
What is LoRA?
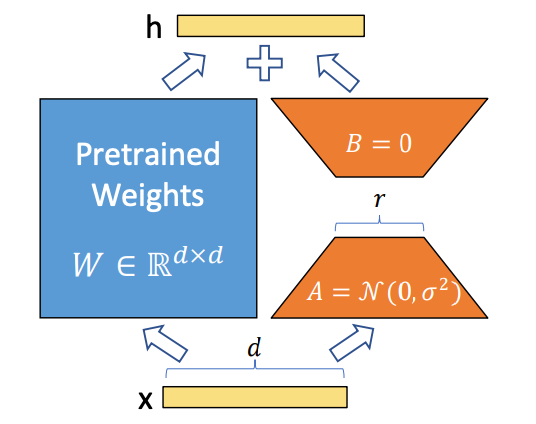 LoRA (Low-Rank Adaptation) is a small, targeted layer that nudges a big model toward a specific style, character, or aesthetic, without retraining the whole thing. Think of it as a gentle lens you can add or remove. The base model keeps its broad skills: the LoRA teaches it a preference.
In practice, LoRA files are compact, quick to train, and cheap to swap. That last part matters for workflows. I don’t want a separate model checkpoint for every brand palette or character. I want one fast backbone (Z-Image-Turbo) and a few swappable dials.
Why LoRA for Z-Image-Turbo?
 Z-Image-Turbo on WaveSpeed is tuned for speed. Great for iterating, but speed alone doesn’t solve “consistent style.” LoRA fills that gap. I can:
- keep the baseline model snappy,
- attach a pre-made LoRA for a look or character,
- or train a tiny custom LoRA for my own assets.
What surprised me was how much control the scale parameter gave me. A small scale (0.3–0.6) kept the base model’s strengths. A higher one (0.8–1.0) pushed harder into the learned style, sometimes too hard. I started low, then bumped up until it felt right. That simple habit reduced re-renders by about a third for me over the week.
Using Pre-Made LoRAs
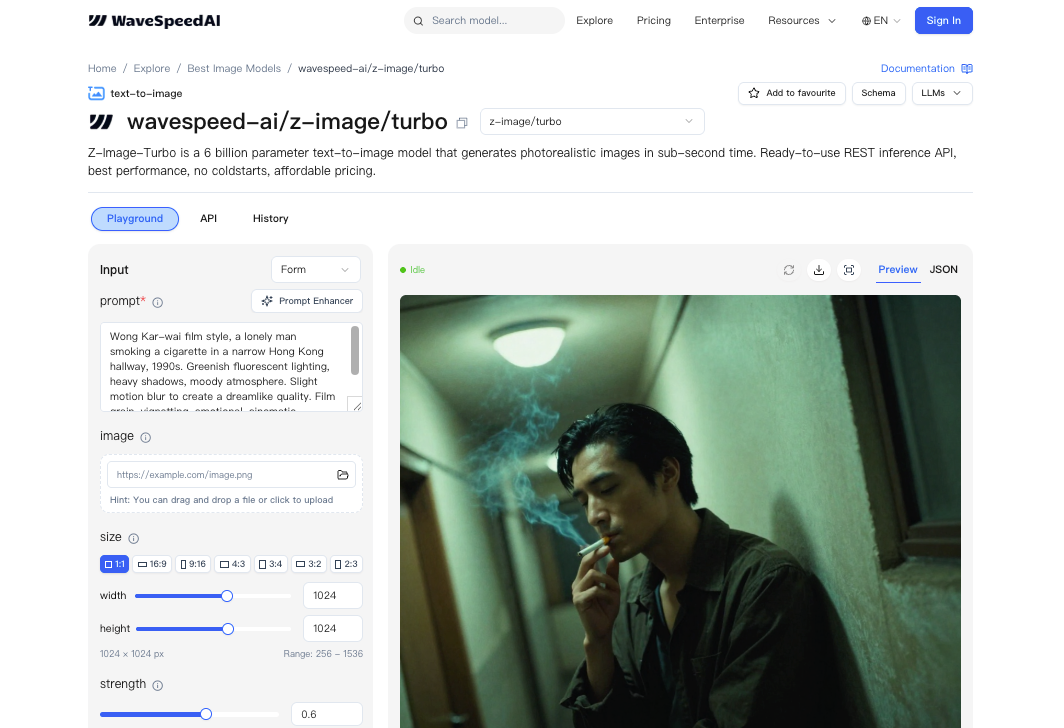
I first tried pre-made LoRAs because I didn’t want to train anything before I knew the edges. WaveSpeed treats LoRA like a plug-in, point to a file, set a scale, go.
Finding Compatible LoRAs
Compatibility comes down to format and base model family. If a LoRA was trained against a similar diffusion backbone (and noted as compatible with Z-Image-Turbo or its lineage), it generally behaved. I kept a short checklist:
- same or adjacent base model family,
- version notes if provided (date + model tag),
- a preview gallery that shows variety, not just cherry-picked hits.
When a LoRA looked “too perfect,” I assumed overfitting. In my tests, those tended to collapse on prompts outside a narrow lane. The better sets held up when I changed lighting or camera terms.
API Parameters: path + scale
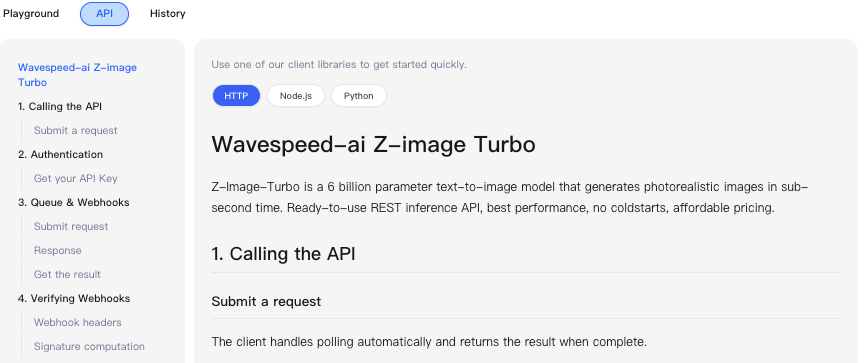 WaveSpeed’s API uses a simple structure per LoRA: a path (where the LoRA file lives) and a scale (how strongly it applies). Path can be a hosted WaveSpeed asset or a signed URL you control. Scale is a float. I lived mostly between 0.35 and 0.7. Below 0.3, I often couldn’t tell it was on: above 0.8, it sometimes bulldozed composition.
A small note from actual runs: if your path is wrong or the asset is private without the right token, you won’t always get a loud error, you’ll just get base-model-looking images. When something felt suspiciously generic, I double-checked the path.
Stacking Multiple LoRAs (Up to 3)
You can stack up to three LoRAs. I tried one for color treatment, one for a brand texture, and one for character features. It worked, but only after I balanced their scales. If two LoRAs fight (say, one insists on soft film grain while another adds crisp product sheen), the image looks undecided. My rule:
- start each at 0.3,
- identify the anchor LoRA (the non-negotiable look),
- raise that one slowly,
- nudge the others until they complement rather than compete.
Stacking saved me time when I needed both brand feel and a recurring character. It didn’t save time when I tried to force three heavy styles at once. That just pushed me back into trial-and-error.
API Implementation
Here’s how I wired this up in a small script. I used prompts that I actually ship with: product mockups with background variations, plus a few character shots for internal docs.
LoRA Parameter Structure
The request body includes a loras array. Each item:
- path: string (WaveSpeed asset path or signed URL)
- scale: float (0.0–1.0: I recommend 0.3–0.7 to start)
Other Z-Image-Turbo params (prompt, negative_prompt, seed, steps, width/height) work as usual. Seeds helped me compare scale changes apples-to-apples.
Python Code Example
import requests


API_KEY = "YOUR_WAVESPEED_KEY"

ENDPOINT = "https://api.wavespeed.ai/v1/z-image-turbo/generate"


payload = {

"prompt": "minimal product photo of a cobalt-blue bottle on soft textured linen, natural window light, 50mm, f2.8",

"negative_prompt": "text, watermark, harsh shadows, warped label",

"width": 768,

"height": 768,

"steps": 16,

"seed": 12345,

"loras": [

{"path": "wavespeed://assets/brand/linen_texture_lora.safetensors", "scale": 0.45},

{"path": "wavespeed://assets/brand/cobalt_hue_lora.safetensors", "scale": 0.55}

]

}


headers = {

"Authorization": f"Bearer {API_KEY}",

"Content-Type": "application/json"

}


r = requests.post(ENDPOINT, json=payload, headers=headers, timeout=60)

r.raise_for_status()

result = r.json()
# Expect base64 images or URLs depending on your account settings

print(result.get("images", []))
In my runs, 16 steps with Z-Image-Turbo was enough for preview quality. For final images, I nudged to 22–24 steps. That added ~0.3–0.6 seconds per image on my account, which was fine.
Balancing LoRA Scales
I iterated like this:
- fix the seed,
- set all LoRAs to 0.3,
- pick the anchor and raise it by 0.1 until it feels right,
- nudge the others in 0.05–0.1 steps.
Keeping the seed fixed while dialing scales helped me see the effect directly. Once I liked the balance, I unfixed the seed for variation. This didn’t save me time at first, I spent 15–20 minutes just getting a feel. But on day three, I noticed I’d stopped tweaking prompts. The scales carried the style, and I focused on layout and copy instead.
Training Custom LoRAs
After pre-mades, I trained a small LoRA for a client’s bottle shape and label style. I did it to cut the back-and-forth where the neck angle and label gloss kept drifting.
Preparing Training Data (ZIP Upload)
I gathered 18 images, cleaned backgrounds, and kept metadata consistent. I zipped them, simple folder, lowercase filenames, no spaces, and uploaded. I added 3–4 captions per image when the label text mattered. When it didn’t, I left captions minimal. More captions helped the label stay legible.
A small friction: images that looked nearly identical didn’t help. I removed near-duplicates and saw less overfitting.
Training Parameters
I kept it light:
- resolution: 768 square crops,
- batch size: 1,
- learning rate: conservative default,
- training steps: 3,000–6,000 for style + shape,
- network rank (r): modest: going high made it “louder” than I wanted.
When I pushed steps past ~8,000, it started to impose the bottle into prompts where I didn’t ask for it. Not ideal. Lower steps plus a cleaner dataset won.
Pricing: $1.25 per 1,000 Steps
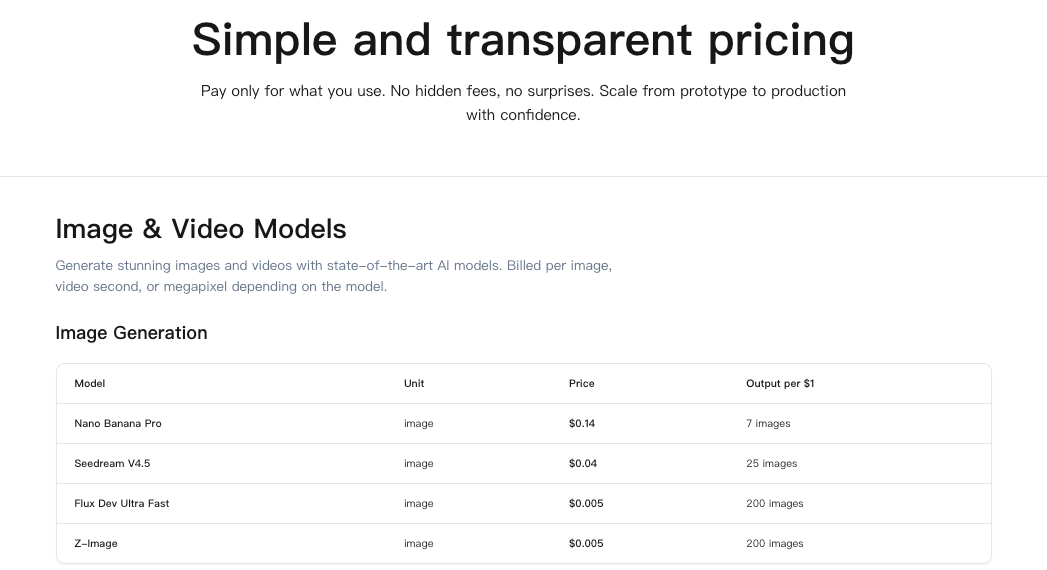 My two runs (3,500 and 5,000 steps) cost $10.63 total at $1.25 per 1,000 steps. That’s reasonable if the LoRA earns its keep for a few months.
Typical Training Budget
What I’d budget now:
- style-only LoRA: 2,000–4,000 steps ($2.50–$5.00),
- character with expressions: 5,000–8,000 steps ($6.25–$10.00),
- product form + label details: 3,000–6,000 steps ($3.75–$7.50).
I’d run one shorter pass first, sanity-check results, then top up if it’s promising. Two smaller runs beat one long overfit session.
Use Cases
These are the spots where LoRA on Z-Image-Turbo helped me ship faster, not every day, but reliably when the task fit.

Brand Style Consistency
If you’re tired of re-typing brand cues into every prompt, a mild style LoRA at 0.4–0.6 keeps color, contrast, and texture in line. I used this for social variants and web banners. It didn’t make them brilliant: it just made them consistent. That’s the point. I saved maybe 5–7 minutes per deliverable by skipping round two of “fix the vibe.”
Character LoRAs
For internal docs and a lightweight mascot that shows up in onboarding screens, a character LoRA kept features steady across angles. Stacking it with a soft color treatment worked, but only after I cut the character scale to 0.35. Any higher and it steamrolled lighting. Once dialed, it removed a weird mental load: I stopped worrying if the face would drift.
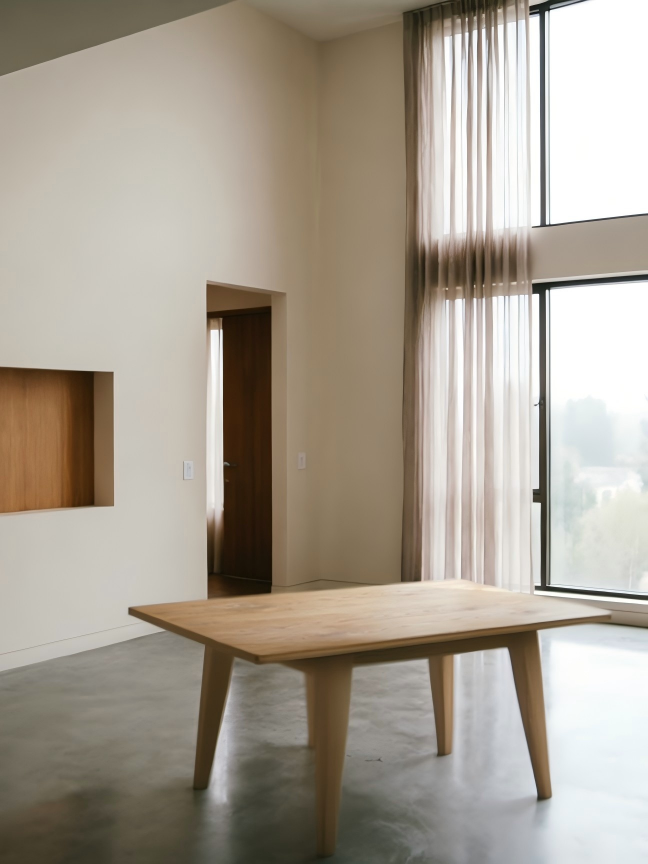
Product-Specific Aesthetics
The custom bottle LoRA reduced label warping and preserved the neck geometry across close-ups. It wasn’t flawless, tight reflections still took a couple tries, but it lowered the number of unusable renders. The quiet win was predictability. When I typed “three-quarter angle on linen,” I got it, not a surprise variant.
Who might like this: folks who already know what they want and are tired of re-arguing with the model. Who won’t: people exploring wild new styles every time. LoRA is a stabilizer. It shines when you value fewer surprises over more fireworks.
Related Articles
Introducing Bria Embed Product on WaveSpeedAI
Introducing Google Nano Banana 2 Edit Fast on WaveSpeedAI